
Practical AI · 7 min read
Edit your videos with AI
Give a local AI agent the footage, describe the treatment you want and review a short sample before applying it to an entire recording. This guide walks through the setup, instructions, timeline and export using a real eight-second Hyperframes project. The demonstrated edit adds an animated title over existing footage and retains the source audio. A full spoken-video recut and caption pass are separate tasks.
Give a local AI agent the footage, describe the treatment you want and review a short sample before applying it to an entire recording. This guide walks through the setup, instructions, timeline and export using a real eight-second Hyperframes project. The demonstrated edit adds an animated title over existing footage and retains the source audio. A full spoken-video recut and caption pass are separate tasks.
1. Use an environment that can edit and render
A normal chat attachment does not automatically give the AI a video-editing environment. This example uses a local coding agent with Hyperframes, which builds video compositions from HTML and provides a browser-based editing timeline. Use its official quickstart for current setup instructions.
Ask the agent to inspect what is already installed before adding anything. Hyperframes' documented local workflow requires Node.js and FFmpeg. A paid chat subscription alone does not establish that those tools, file permissions or video capabilities are ready.
I want to edit a local video with Hyperframes. Read the official setup instructions and check the existing environment. Tell me what is already available, what is missing and where the project will be saved. Do not overwrite my original footage.
Once the environment is ready, keep the original recording and editable project together in a clear folder. Give the finished export a separate name so you can compare it with the source.
2. Identify the right inputs
Include the footage, your logo if needed, approved supporting visuals and a transcript if you have one. If the transcript is generated, check names, numbers and technical terms before using it for captions.
Inspect the video folder. Identify the source file, duration, dimensions, orientation and audio tracks. Confirm which file you will edit. Keep the source unchanged and create the output separately.
The demonstrated project contains source.mp4, the editable composition index.html and an exported edited-sample.mp4. The source is eight seconds long. That small scope makes it easier to check the rendering process before working on a longer recording.
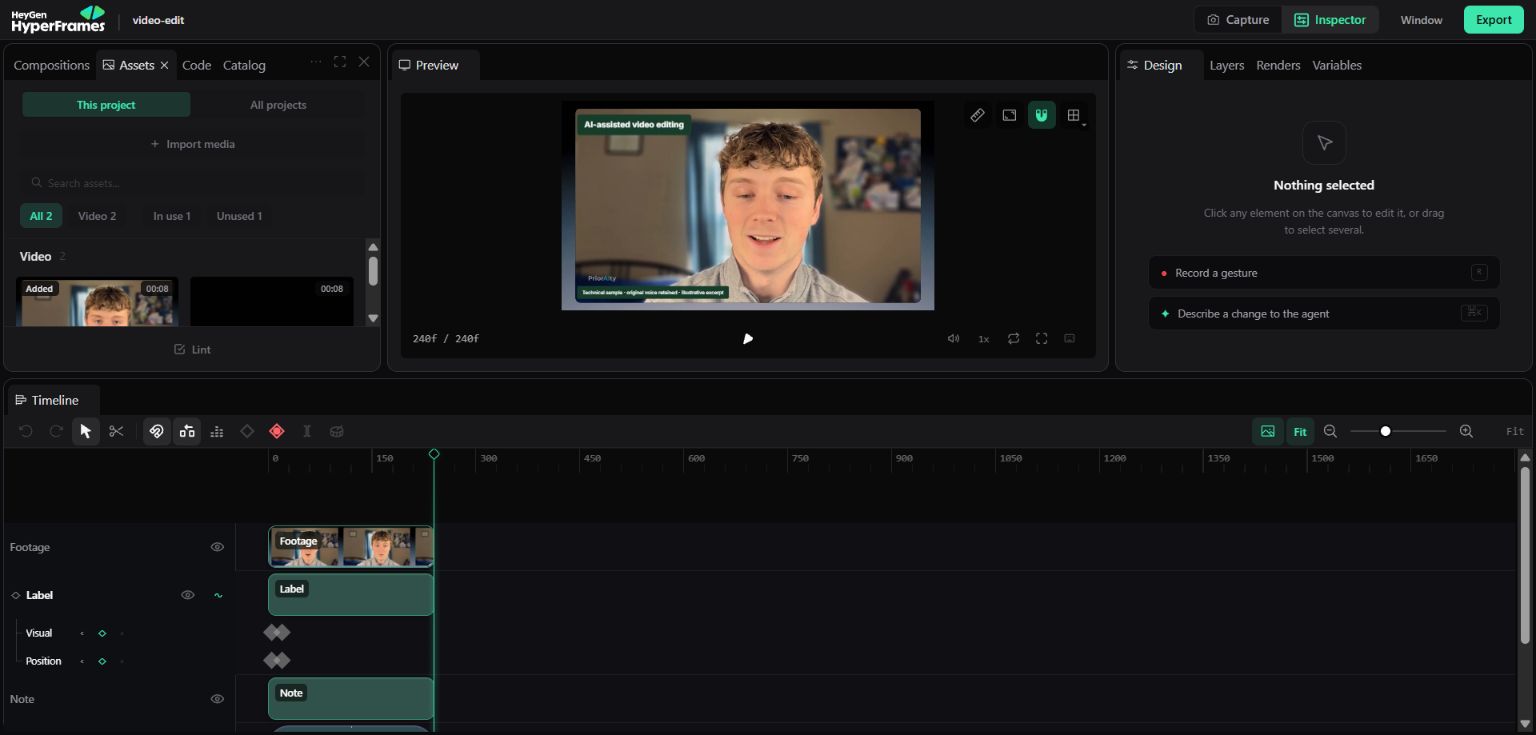
The Assets panel and timeline show the real footage and overlay layers. The screenshot is from the editing environment, not an illustration of a hypothetical workflow.
3. Specify the treatment in visible terms
“Make it engaging” leaves the AI to invent your style. Tell it what you want to see and hear. For this technical sample, the treatment is an animated title, a small explanatory label and unchanged source audio. It does not remove pauses or replace the speaker's voice.
For a fuller educational edit, your request could be:
Create a short sample from the opening section. Preserve my natural voice and complete thoughts. Remove clear mistakes and long dead space only. Add readable captions and relevant screenshots when I refer to the tool. Keep the presenter visible and music below the speech. Show the sample before applying the treatment to the full video.
That fuller request is a suggested next workflow, not a description of everything in this eight-second example. Captioning needs transcription and timing checks. Cutting speech needs a reviewed cut plan. Adding graphics should not quietly change the meaning or sequence of the explanation.
4. Make reference styles specific
If you provide a reference video, explain what you like: caption size, pacing, framing, use of screenshots or how the opening result appears. Ask the agent to say what it could actually access. A pasted link does not prove it watched the video.
Inspect this reference if accessible. Tell me which parts you could see and hear. Describe the editing principles worth adapting, then use my footage and approved assets. If you cannot inspect it, tell me what screenshots or transcript would help.
Keep the useful principles while making the result fit your content. A fast entertainment edit and a step-by-step software explanation may need very different pacing. The viewer needs enough time to understand the screen being shown.
5. Review the actual timeline
Hyperframes Studio provides a preview and tracks for the project. In this example, the footage, title, note and audio have separate roles. The animated title appears over the source rather than replacing it.
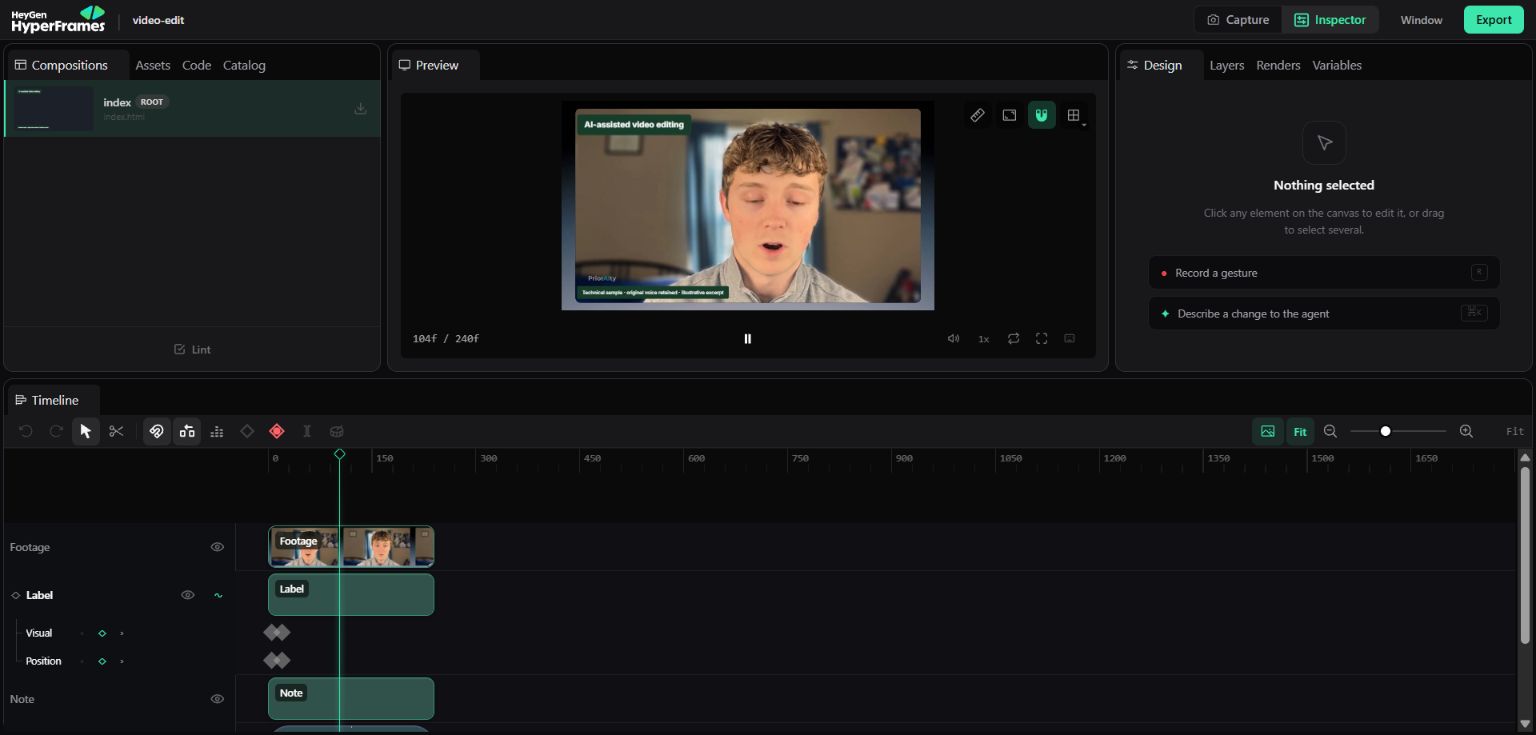
The preview shows the presenter while the timeline exposes the footage and title layers. This is the point to inspect timing and placement before exporting.
Play the sample and check whether the text covers anything important, appears at the right moment and stays readable. For a narrated walkthrough, check whether a screenshot appears when the spoken instruction refers to it. A technically valid timeline can still be difficult to follow.
Use precise feedback:
At 00:03, the title competes with the screen detail. Move it above that area and keep it visible for one more second. Preserve the footage and audio timing. Show the revised sample.
The timestamp and desired outcome make this much easier to act on than “make the edit better.” Review a short section again before expanding the treatment.
6. Export the video, then inspect the file
The demonstrated Studio export uses MP4, 1920 × 1080 and 30 frames per second. Choose dimensions for the destination. A landscape file is not automatically suitable for a vertical post; reframing needs its own visual review.
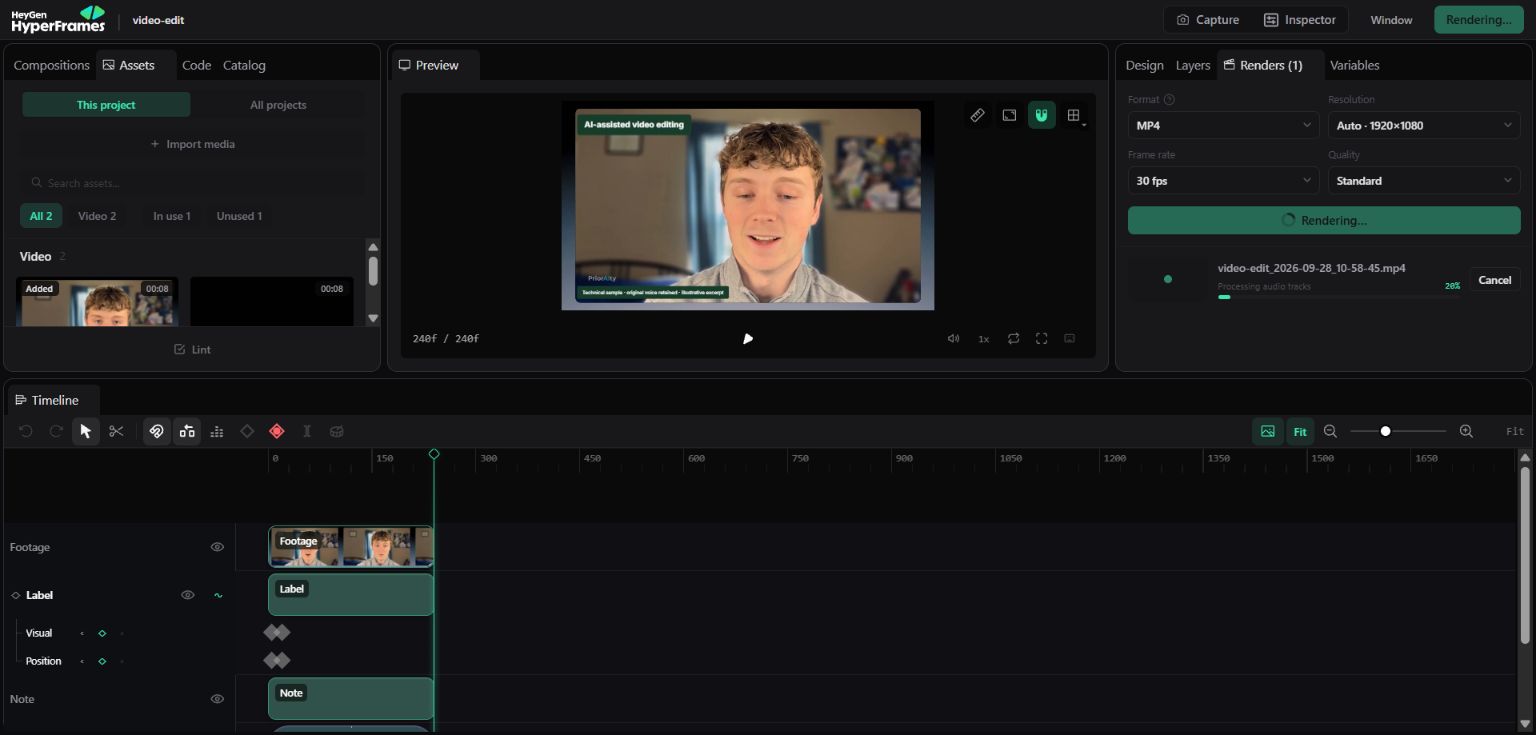
This capture shows the real render process and its settings. The editable project remains separate from the MP4.
After export, open the MP4 outside the editing preview. Check the first and last frames, duration, sound and any text. A successful render message does not prove the edit is right. If there are captions, read them against the audio. If there are citations or screenshots, confirm they support the point being made.
The included sample is eight seconds at 1920 × 1080 with an audio track. It demonstrates an overlay and render workflow. It is not evidence that a full recording has been transcribed, recut or matched to a third-party creator's style.
7. Keep the project ready for revisions
Save the source footage, editable composition, export and any referenced assets. Keep a short note of what changed and what still needs review. If you later ask for a different opening, the agent can work from the project instead of rebuilding from the finished MP4.
For a full recording, review complete-sentence cuts, caption spelling and timing, supporting visuals, music balance and the final frame. Use your natural voice as the reference for audio treatment. If an edit sounds processed or clips the beginning of words, ask for lighter treatment or restoration of the original segment.
Practice files and tested scope
Watch the exported sample and open the editable composition source. The source HTML is project code; use Hyperframes Studio for its timed preview. The project was opened, played and exported in Studio during this walkthrough. The footage is an illustrative excerpt; a complete production edit needs the checks described above on its own recording.
Keep a copy of the guide
Download the PDF to keep the steps and prompts handy while you work.